You’ve completed your brand photo shoot.

A huge sense of relief washes over you. After all, you pulled it off! But in reality, much of your work has just begun.
In the first part of this series, we explored the brand vision for your photoshoot and in this post, we’re going to cover what happens after you’ve wrapped. These post-production steps can sometimes have additional costs and more wait time than you’ve allotted for so it’s good to be prepared.
What I learned in post-production is that while a lot that can be accomplished with a great makeup artist, amazing lighting and a solid shot list, there are still final adjustments that often need to made if you want a really polished outcome.
ACT ONE: SELECTS
Within a week of finishing my shoot with Monica, the photos came in via Dropbox and it was my turn to review and choose my selects for retouching.
As I looked over the photos, I kept thinking back to Sarah’s original shot list — what was the goal of each shot? Did it have the right emotion? Was there enough negative space for text to be overlaid on some of them? I did at least three passes before sending over my final retouch list to Monica — commitment is hard!
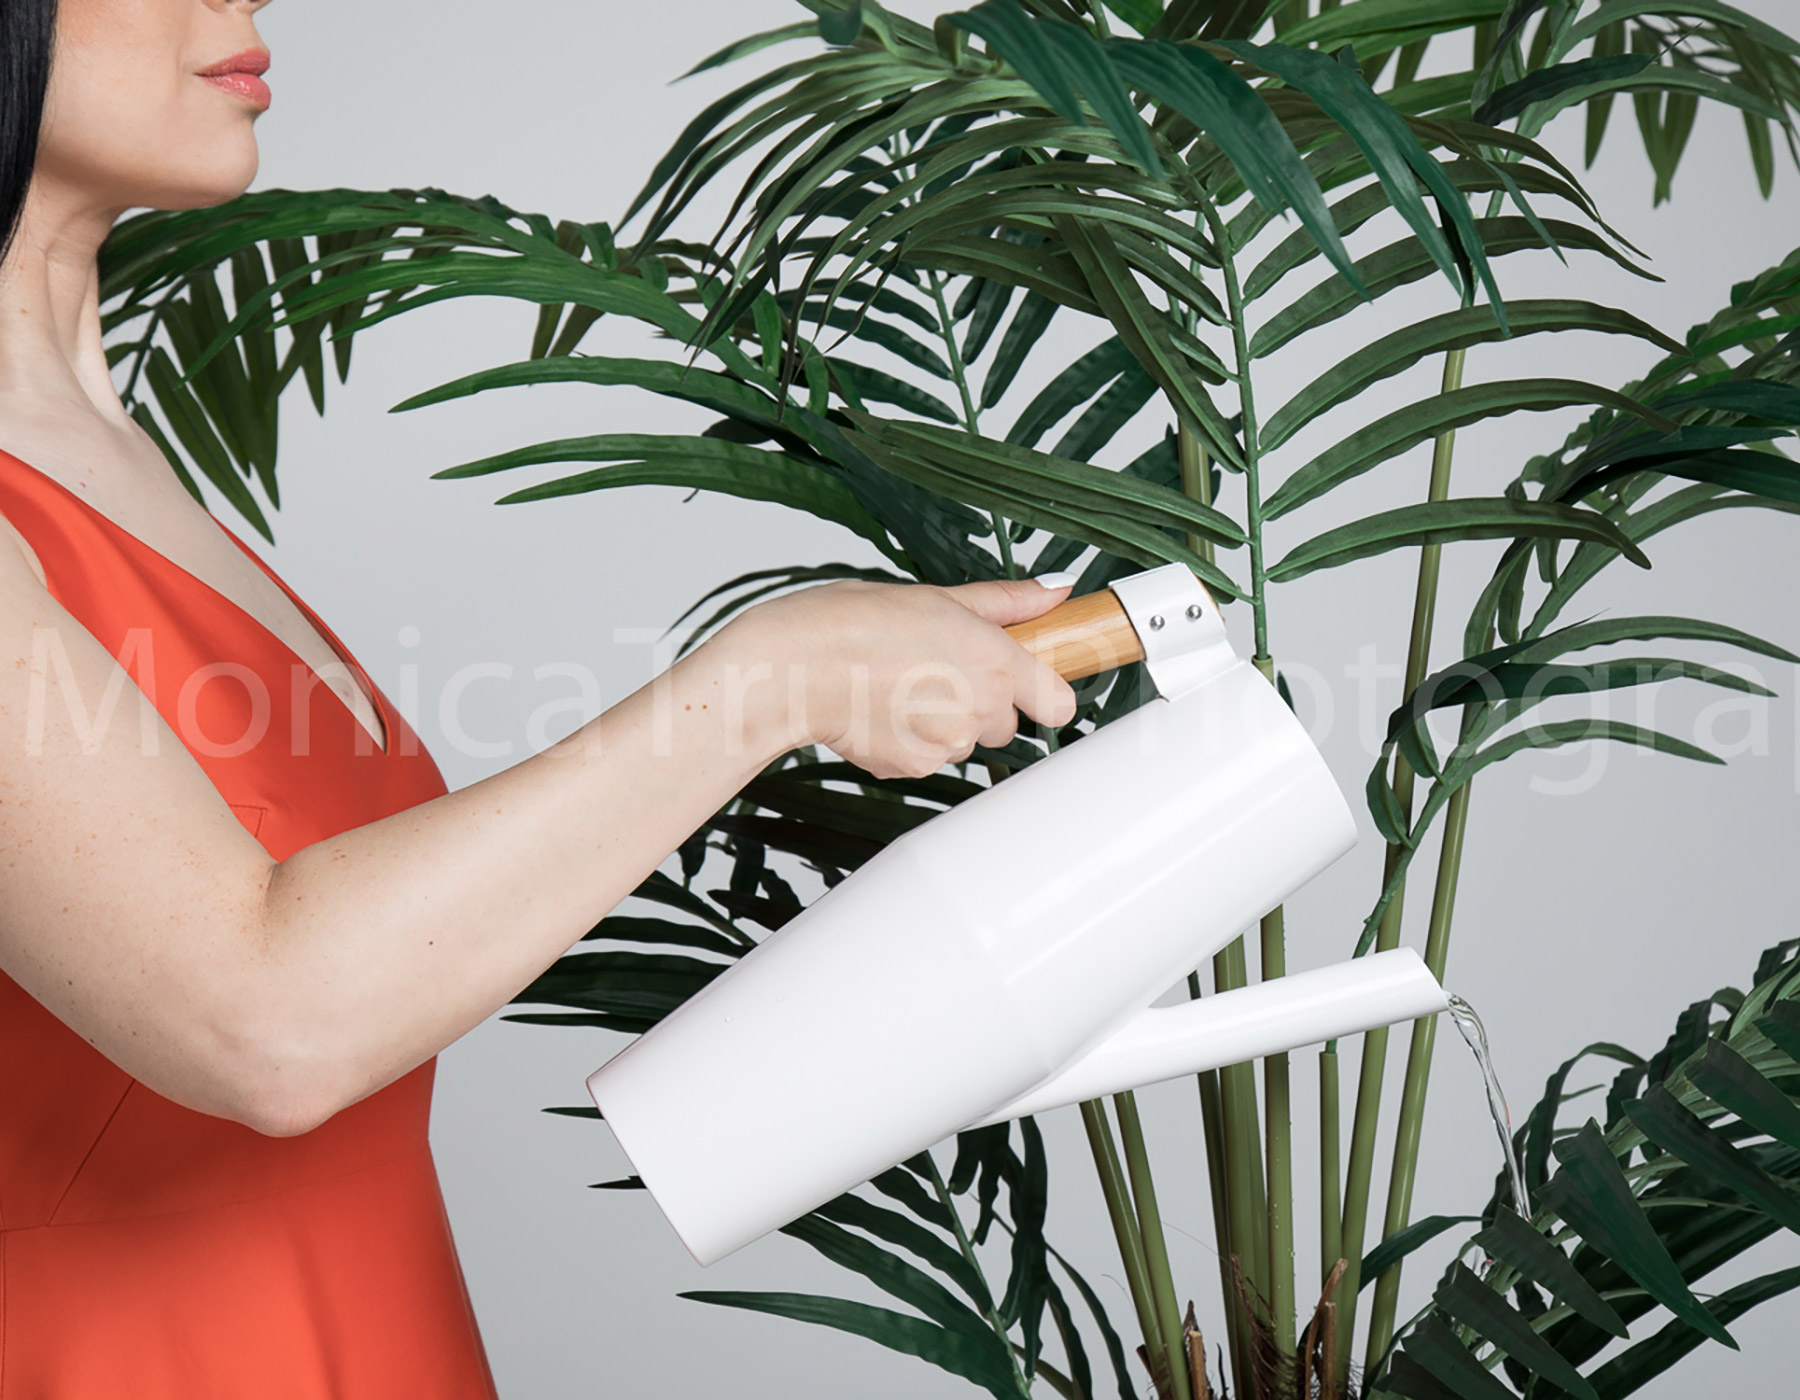
An example of a raw, low-res image is shown above for reference.
ACT TWO: RETOUCHING
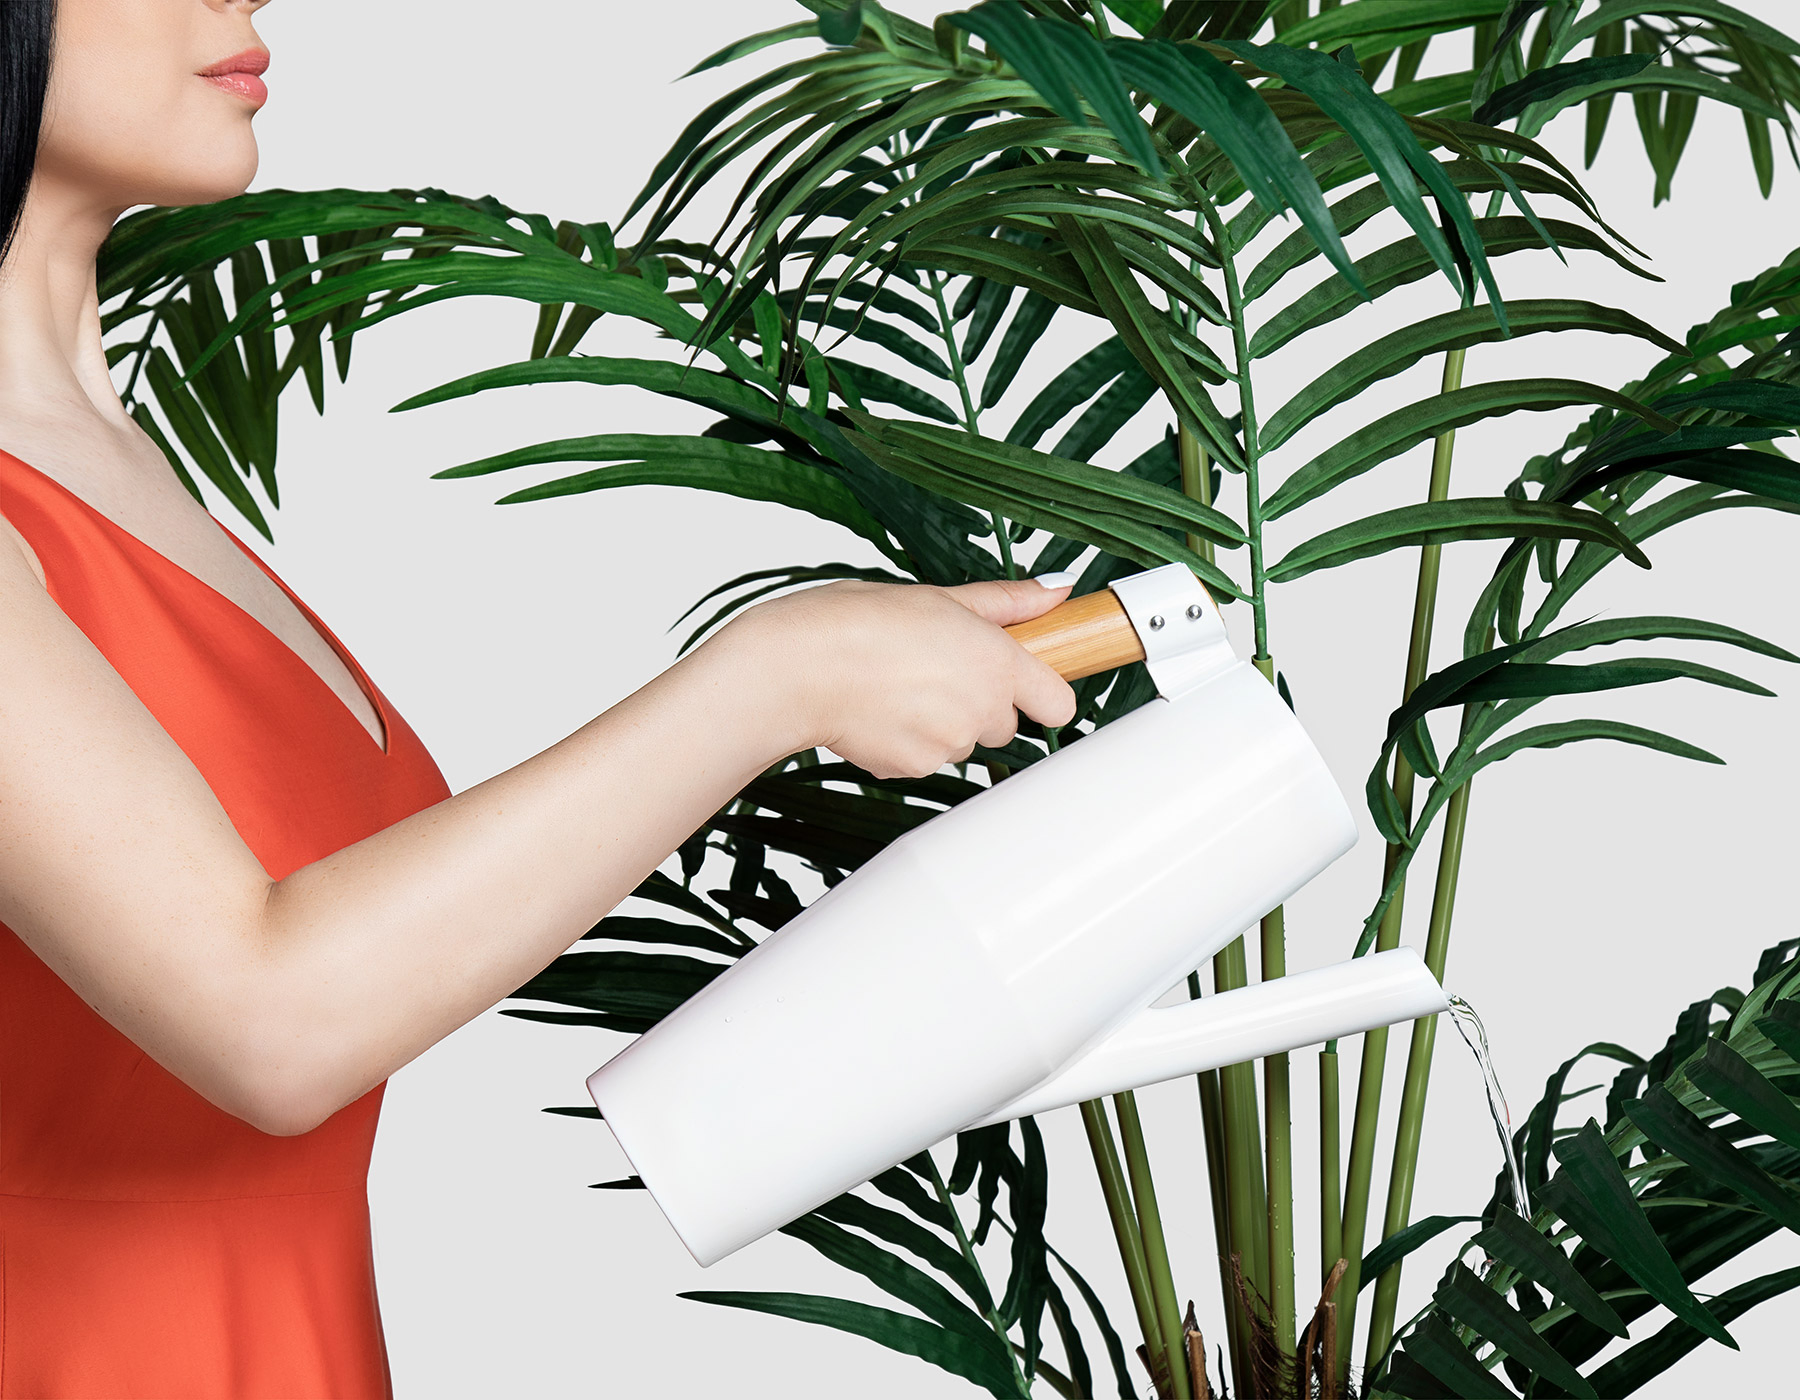
Even with all the prep that happens on set, retouching is necessary for small details.
In my case, in some of the scenes I wanted my dress to be color matched to the exact hue of the vintage typewriter, excess wrinkles removed from clothing and some minor skin touch-ups — all fairly minimal things that when combined, added a subtle refinement to the finished outcome.
Honestly, I was shocked at what a difference the retouching made when I got the images back. The lighting was more even, my skin tone was smoother and even the smallest details popped.
An example of a retouched image is shown above for reference.
ACT THREE: COMPOSITING
After the retouching, we still had one more step to go.
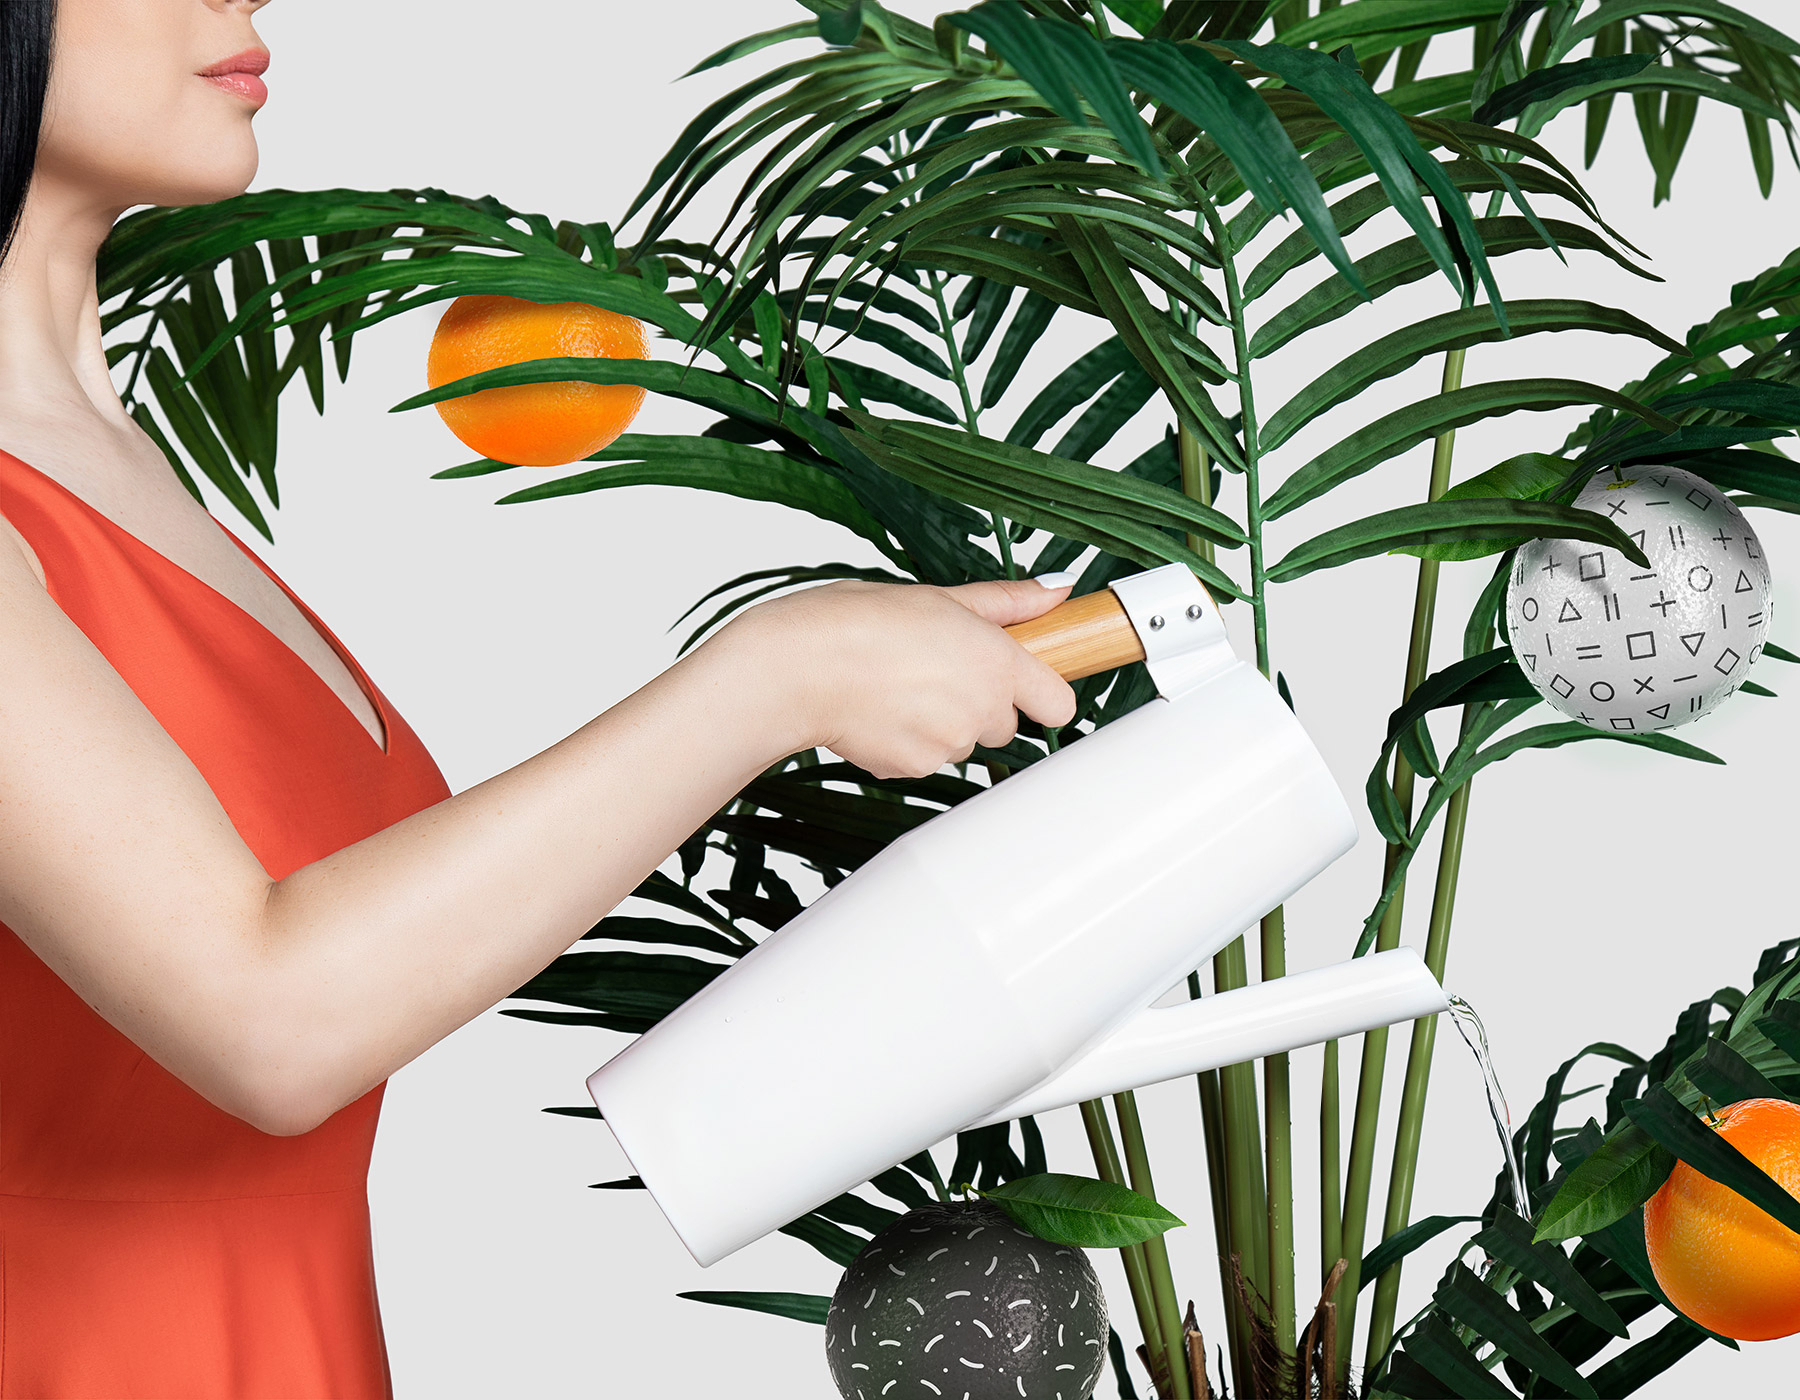
Remember that faux palm tree? Well, I wanted that palm tree to be loaded with big, juicy oranges but we all know that oranges don’t grow on palm trees. I know you’re thinking, “Wait a minute, why are the oranges growing on a palm tree?!” That’s exactly the point — this isn’t any fruit, it’s Branch designer fruit!
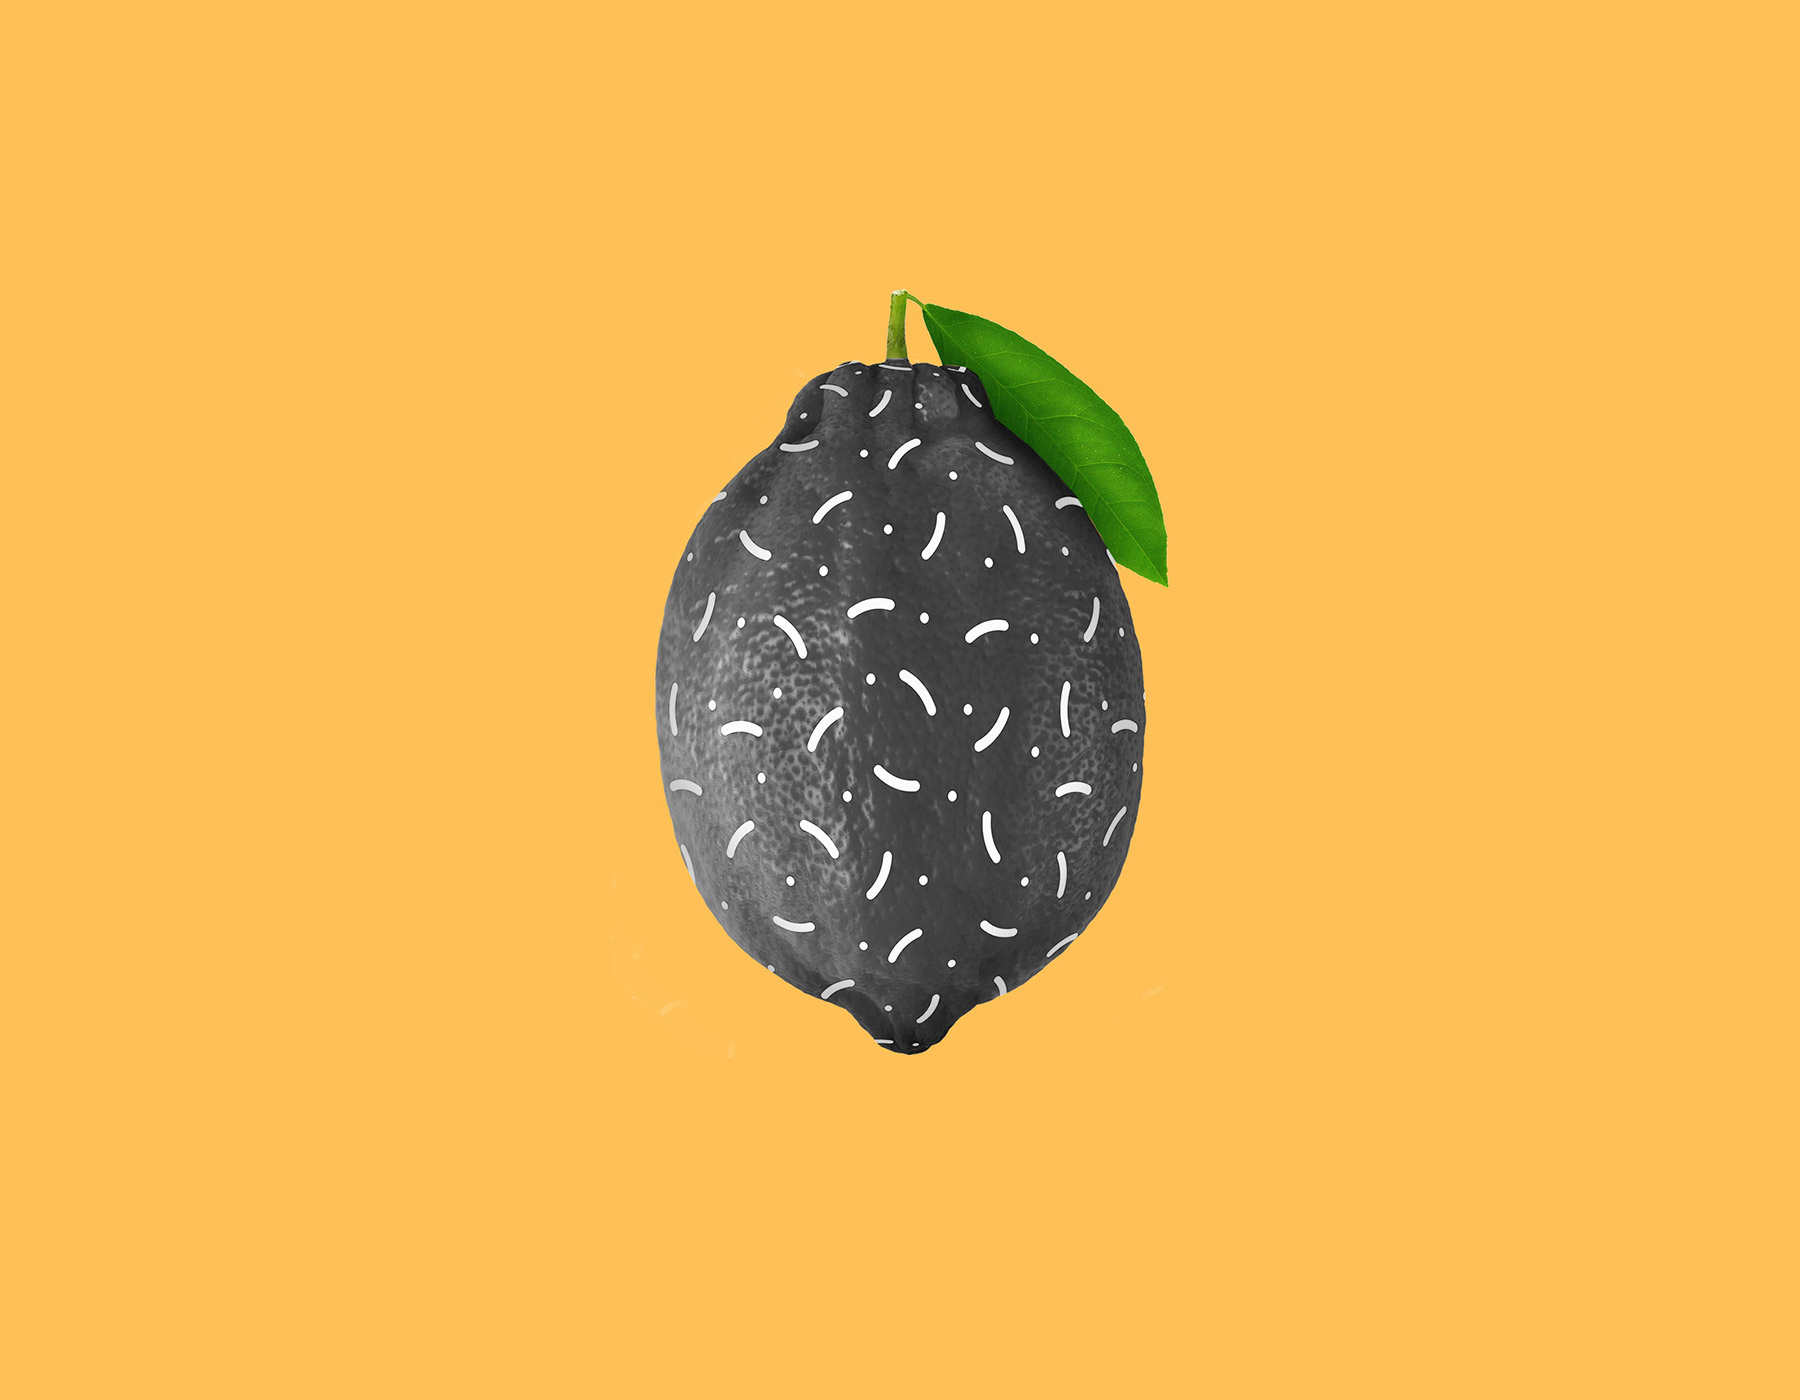
To fill the tree with fruit, Sarah had gone onto the set early, shooting the fruit from different angles with Monica while I was getting prepped. She did this with the same lighting as my palm tree photos so the shadows would match. We also shot lemons (see the top of this post) but in the end, I liked the roundness of the oranges.
Once the retouched photos were complete, I sent Sarah the asset link and she took over, compositing the oranges in, some with designer patterns. We actually tried this a few different ways but all of the oranges wrapped in a pattern lost the vibrant, juicy pop of color while all natural oranges lacked that designer twist I was seeking. In the end, we went with a handful of patterned oranges because the mix keeps it visually interesting.
An example of a retouched, composited image is shown above for reference.
ACT FOUR: COPYWRITING
There are sometimes weeks of downtime between choosing selects and then getting retouching and compositing done. Schedules need to align, work needs to get completed and often, there are more revisions.
While you’re waiting on the delivery of your final photos, this is the perfect window of time to brush up on your website copy. The reason this is the perfect time is because you’ve already gone through your creative process and stepped into character on set. You’ve been living and breathing your brand for months non-stop at this point so if there was any confusion before about what you stand for and what makes you unique, that should have mostly dissipated and been replaced with newfound clarity.
If writing isn’t your strong point, hire someone to help. There are so many amazing copywriters out there (If you need suggestions, just ask!) who can refine your rough tidbits into beautifully crafted content. In my case, I pulled the copy from the current Branch site into one big text document, copying and pasting, page by page.
From there, without the visual noise of the site design distracting me, I pulled open notes of Sarah’s suggestions from our two strategy sessions. Her big ask was to weave the keywords of our new visual strategy into the existing copy so I sprinkled in words and phrases like growth, juicy, fruits of our labor, fresh picked and more to create a more cohesive alignment between the imagery and copy.
I hope this gives you a better idea of what to expect post-shoot! In part 3 of this series, I’m going to share some steps to consider as you pull the completed imagery and copy into your website design. -Shauna
Special thanks to Public Persona, Monica True and Rachel Lane, the ultimate dream team!
